
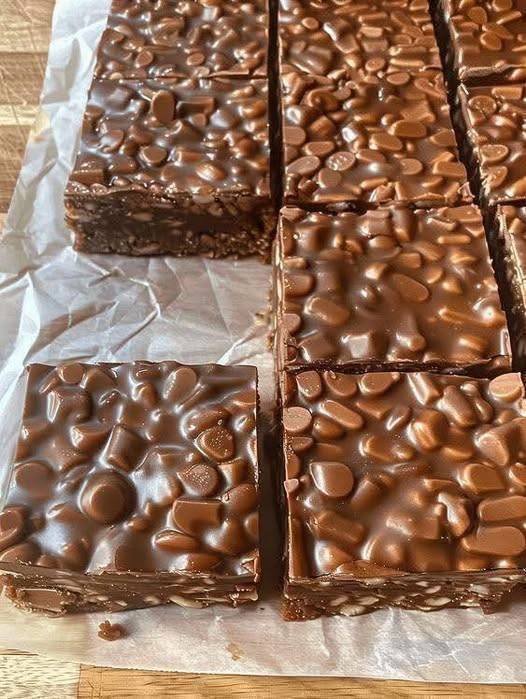
There is something truly comforting about the combination of chocolate and peanut butter. It brings back childhood memories, cozy evenings, and simple homemade treats. These Chocolate Peanut Butter Crunch Bars are one of those recipes I keep coming back to again and again. They are quick, no-fuss, and always a crowd favorite.
What makes these bars extra special is the crunchy texture paired with smooth, creamy layers. Plus, they don’t require baking, which makes them perfect for beginners or anyone short on time. I often make these when I need a quick dessert for guests or just want a sweet treat with my evening tea.
Another great thing about these Chocolate Peanut Butter Crunch Bars is that they can be made with simple pantry ingredients. They are also easy to adjust for different diets, making them a flexible and family-friendly option.
Why You Will Love This Recipe
- Easy to make – No oven needed and simple steps
- Perfect texture – Creamy, crunchy, and chocolatey in every bite
- Quick recipe – Ready in under 30 minutes (plus chilling time)
- Kid-friendly – Loved by both kids and adults
- Customizable – You can easily change ingredients to suit your taste
Ingredients List
Here’s everything you need to make these delicious Chocolate Peanut Butter Crunch Bars:
- 1 cup creamy peanut butter
- ½ cup honey or maple syrup
- 2 cups crispy rice cereal
- 1 cup chocolate chips (semi-sweet or milk chocolate)
- 1 teaspoon vanilla extract
- 1 pinch salt (optional, but recommended)
All these ingredients are easy to find and budget-friendly.
Step-by-Step Instructions
Step 1: Prepare the Base
In a large bowl, mix the peanut butter and honey until smooth. Add vanilla extract and a pinch of salt. Stir well.
Step 2: Add the Crunch
Now add the crispy rice cereal to the mixture. Gently fold everything together until the cereal is fully coated. Take your time here so the crunch stays intact.
Step 3: Shape the Bars
Line a baking dish with parchment paper. Press the mixture evenly into the dish. Use the back of a spoon to flatten it nicely.
Step 4: Melt the Chocolate
In a microwave-safe bowl, melt the chocolate chips in 20–30 second intervals. Stir in between until smooth.
Step 5: Add the Chocolate Layer
Pour the melted chocolate over the peanut butter base. Spread it evenly.
Step 6: Chill and Set
Place the dish in the fridge for about 1–2 hours or until firm.
Step 7: Slice and Serve
Once set, cut into bars or squares. Your Chocolate Peanut Butter Crunch Bars are ready to enjoy!
Pro Tips & Variations
- Use natural peanut butter for a healthier version, but make sure to stir it well first
- If you like extra crunch, add chopped nuts like almonds or peanuts
- Swap honey with maple syrup for a vegan option
- Want it sweeter? Use milk chocolate instead of dark chocolate
- Avoid pressing too hard when shaping the bars, or they may become too dense
Common mistake to avoid:
Don’t overheat the chocolate. It can burn quickly and lose its smooth texture.
Health Benefits Section
While these Chocolate Peanut Butter Crunch Bars are a treat, they also offer some benefits:
- Peanut butter provides protein and healthy fats
- Honey or maple syrup offers natural sweetness compared to refined sugar
- Crispy rice cereal keeps the recipe light and crunchy
These bars are great for a quick energy boost. I sometimes grab one as a midday snack, especially when I need something satisfying but not too heavy.
Serving Suggestions
- Serve chilled for the best texture
- Pair with coffee or tea for a cozy snack
- Add a scoop of vanilla ice cream for a dessert upgrade
- Cut into smaller pieces for party platters
These Chocolate Peanut Butter Crunch Bars are perfect for gatherings, lunchboxes, or late-night cravings.
Storage Tips
- Store in an airtight container in the fridge for up to 1 week
- You can also freeze them for up to 2 months
- If freezing, place parchment paper between layers to prevent sticking
Before serving, let frozen bars sit at room temperature for a few minutes.
Frequently Asked Questions (FAQs)
1. Can I make these bars without peanut butter?
Yes, you can use almond butter or sunflower seed butter as an alternative.
2. Are Chocolate Peanut Butter Crunch Bars gluten-free?
They can be! Just make sure your crispy rice cereal is labeled gluten-free.
3. Can I use dark chocolate instead of milk chocolate?
Absolutely. Dark chocolate gives a richer and slightly less sweet flavor.
4. Why are my bars too soft?
They may need more chilling time. Also, check if the peanut butter mixture was too runny.
5. Can I add extra toppings?
Yes! Try adding sea salt, coconut flakes, or crushed nuts on top of the chocolate layer.
Conclusion
These Chocolate Peanut Butter Crunch Bars are simple, delicious, and perfect for any occasion. They combine creamy, crunchy, and chocolatey goodness in every bite. I love how easy they are to make, especially on busy days when I still want something homemade.
If you are looking for a quick and satisfying treat, this recipe is a must-try. Give it a go, and don’t be surprised if it becomes your new favorite dessert!

Leave a Reply